Image Processing
Sometimes we need to paint a complicated drawing repeatedly. It will be very cumbersome and time consuming if we start the drawing from scratch each time. A better solution is to first draw it on a seperate image, and reuse the image.
Create and Draw on a Image
Use create_image() to create a new image instance.
There are two ways to draw on a image:
- the OOP way: Use the image’s method. The image created by create_image() is an Image object. we can use it’s method directly.
img=create_image(800,600)
img.draw_circle(100,100,50)
- the traditional way: Use the drawing functions mentioned in the previous chapters, and provide the image as an additional parameter.
img=create_image(400,300)
draw_circle(100,100,50,img)
The Graphics Window and The Drawing Target
In Easygraphics, the graphics window is just a special image.
To easy the coding, Easygraphics has a target image property. Most of the drawing functions has an optional paramter “image” or “dst_image”, if it’s not provided, the target image will be where the drawing happens. By default the target image is setting to the graphics window.
So you call drawing functions without specifying which image is to draw, the graphics window will get drawn.
You can use set_target() to change the drawing target, and use get_target() to get the drawing target.
the following code use set_target() to change drawing target to a image, and draw on it:
Note: Remember to use close_image() to close the unused images.
img=create_image(400,300)
set_target(img)
draw_circle(100,100,50)
Saving Image
We can use save_image() to save a image to the disk.
The following program draw a bus and save it to “bus_screen.png” in the current folder.
Note that because:
- By default save_image() will save the drawing target image;
- By default the target image is the graphics window.
So we are saving the graphics window.
from easygraphics import *
import draw_bus

def main():
    init_graph(600,400)
    draw_bus.draw_bus()
    save_image("bus_screen.png")
    pause()
    close_graph()

easy_run(main)
Copy Image
We can use draw_image() to copy part of one image to another image.
In the following example, we:
- create a image and save it to variable “img”
- set drawing target to “img”
- draw a bus to “img” (the drawing target)
- set drawing target back to the graphics window
- copy the content on “img” to the graphics window’s different positions.
from easygraphics import *
import draw_bus

def main():
    init_graph(750, 450)
    img = create_image(210, 130)
    set_target(img)  # set target to img
    draw_bus.draw_bus()
    set_target()  # set target back to the graphics window
    set_background_color("black")
    for i in range(0, 9):
        x = i % 3 * 250
        y = i // 3 * 150
        draw_image(x + 20, y + 10, img)

    pause()
    img.close()
    close_graph()

easy_run(main)
The result:
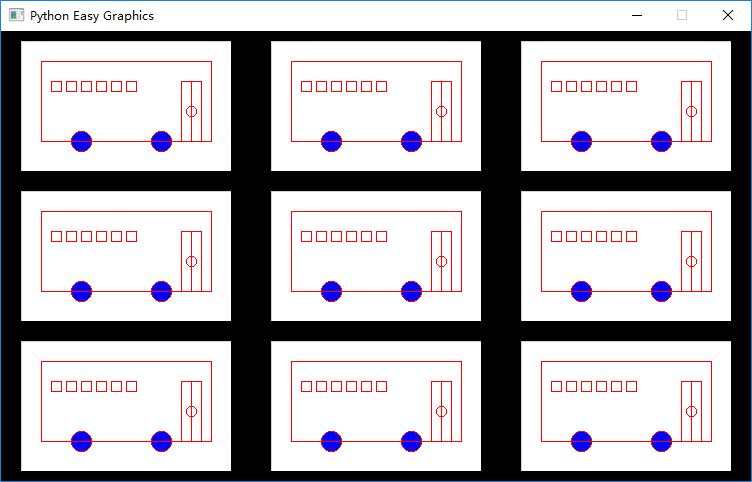
Image Transparency and Composition Mode
put_image() copy a rectangle area to the destination image. If you want to copy things that are not rectanglely outlined, you can draw it on a image with fully transparent background, then copy
The following example is identical to the above example, expect that it set the source image’s background to transparent before drawing the bus.
from easygraphics import *
import draw_bus

def main():
    init_graph(750, 450)
    img = create_image(210, 130)
    set_background_color(Color.TRANSPARENT, img)  # set img's background to transparency
    set_target(img)  # set target to img
    draw_bus.draw_bus()
    set_target()  # set target back to the graphics window
    set_background_color("black")
    for i in range(0, 9):
        x = i % 3 * 250
        y = i // 3 * 150
        draw_image(x + 20, y + 10, img)

    pause()
    img.close()
    close_graph()

easy_run(main)
The result is :
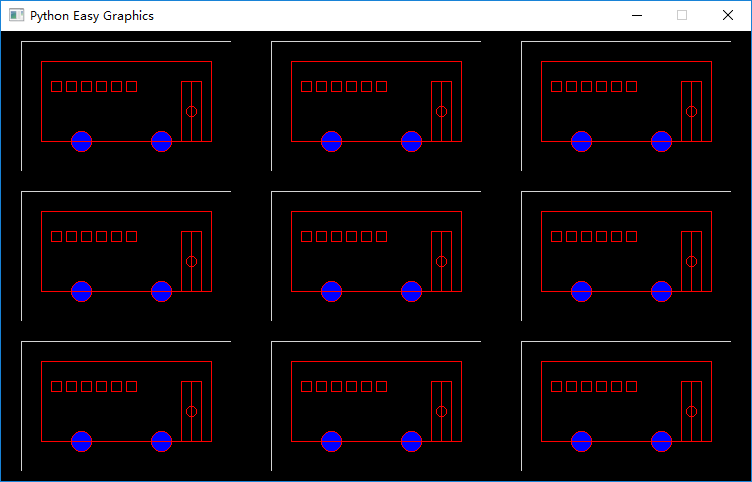
Copy Image without the Background
If you can’t draw with a transparent background, you can copy the image without the background, by set the parameter “with_background” to False.
In the following example, we don’t use a transparent backround, and we do the copy without background.
from easygraphics import *
import draw_bus

def main():
    init_graph(750, 450)
    img = create_image(210, 130)
    set_target(img)  # set target to img
    draw_bus.draw_bus()
    set_target()  # set target back to the graphics window
    set_background_color("black")
    for i in range(0, 9):
        x = i % 3 * 250
        y = i // 3 * 150
        draw_image(x + 20, y + 10, img, with_background=False)

    pause()
    img.close()
    close_graph()

easy_run(main)
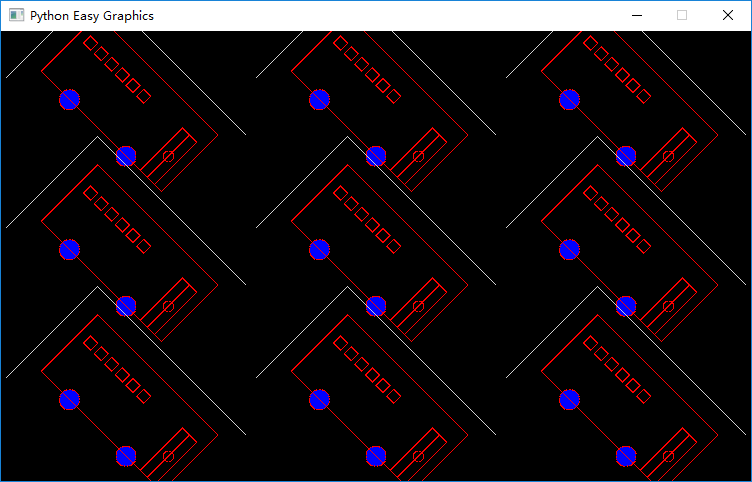
Copy Image with transforms
If you want to copy a image with transforms such as rotation, you should set the transforms before the copy.
The following program copy images with rotation. Note the use of save_settings() and restore_settings(), we use it to save and restore image’s transforms.
Note: It’s a good practice to save the old transfrom before doing any transforms before copy, and restore the old settings after the copy.
from easygraphics import *
import draw_bus

def main():
    init_graph(750, 450)
    img = create_image(210, 130)
    set_target(img)  # set target to img
    draw_bus.draw_bus()
    set_target()  # set target back to the graphics window
    set_background_color("black")
    for i in range(0, 9):
        x = i % 3 * 250 + 20
        y = i // 3 * 150 + 10
        save_settings()
        # transforms
        translate(x, y)
        translate(105, 65)
        rotate(45)
        translate(-105, -65)

        draw_image(0, 0, img, with_background=False)
        restore_settings()
    pause()
    img.close()
    close_graph()

easy_run(main)
Load Image
We can load image from files.
Note: JPEG format doesn’t support transparency. So use the PNG format if you want to save and load image with transparent backgrounds.
The following example load and display a image.
from easygraphics import *

def main():
    init_graph(800, 600)
    img = load_image("test.png")
    draw_image((get_width() - img.get_width()) // 2,
               (get_height() - img.get_height()) // 2, img)
    pause()
    img.close()
    close_graph()

easy_run(main)
Headless Mode
Sometimes we just want to draw and save the image, and don’t need to display it on the screen. Easygraphics provides a headless mode to do the jobs. In this mode, no graphics window is displayed, and functions for animations such as pause() won’t work.
The following program shows how to use init_graph() to create a headless mode.
from easygraphics import *
import draw_bus

def main():
    init_graph(headless=True)
    img = create_image(210, 130)
    set_target(img)
    draw_bus.draw_bus()
    save_image("headless_bus.png")
    img.close()
    close_graph()

easy_run(main)